From Iphone Photography School
Home › Tutorials › iPhone Camera
How To Use iPhone AE/AF Lock For Perfect Focus & Exposure
Posted by Rob Dunsford
The AE/AF Lock feature is invaluable for achieving perfect iPhone focus and exposure in your photos. If you’re wondering how to access this feature, and why you would need to use it, this article has the answers! In this tutorial, you’ll learn how to activate AE/AF Lock on your iPhone camera, and how to use it in a variety of shooting situations. Once you master AE/AF Lock, you can be sure that your photos will always be sharply focused with perfect exposure.
What Is AE/AF Lock?
AE/AF Lock is an iPhone camera feature that allows you to lock the focus and exposure values when taking a photo.
AE stands for Auto Exposure. Exposure refers to the brightness of the image. AF stands for Auto Focus. Focus is to do with which part of the image appears in sharp focus.
If you just point your iPhone camera at a scene and press the shutter button, the camera will decide which part of the scene to focus on (usually the middle of the frame), and what level to set the exposure.
To create the best possible image it’s essential that the camera is focusing on your intended subject. So rather than letting the iPhone decide what to focus on, you should always set the focus point manually.
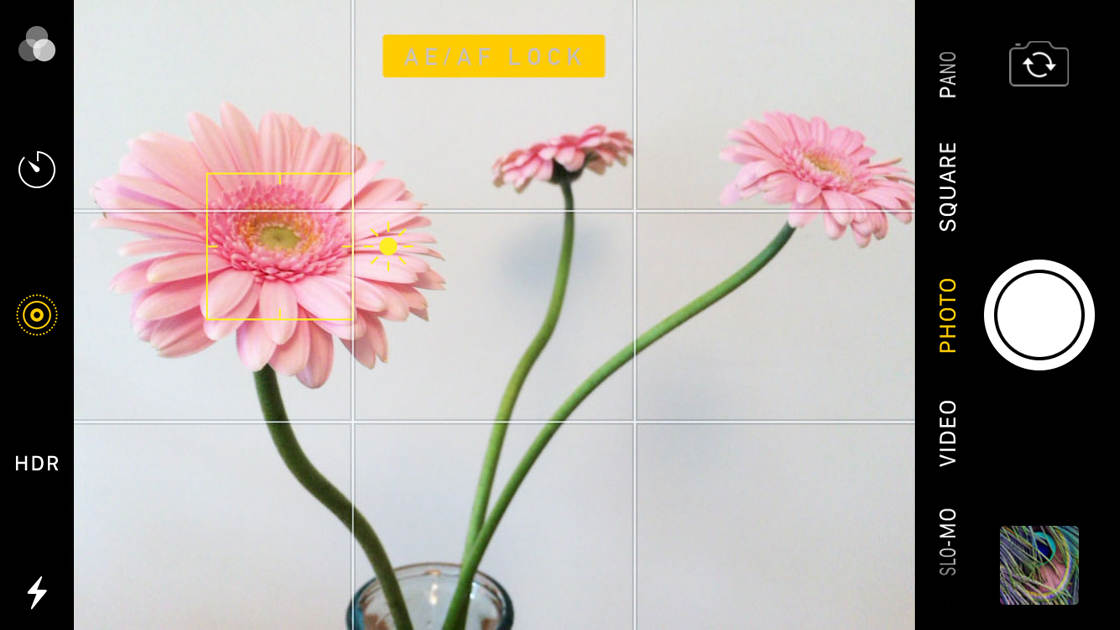
To set the focus point, you can simply tap once on the iPhone screen. Doing this also sets the exposure level (how bright the subject appears). The camera will aim to ensure that the area that’s in focus is properly exposed (not too bright and not too dark).
When you tap to set focus, you’ll see a yellow box appear around the part of the scene that you tapped on. This indicates your focus point. If you need to adjust exposure to make the image brighter or darker, just swipe up or down on the screen.
Tapping once to set focus works well in many situations, but in certain conditions this isn’t enough. For example, if something moves within the scene, the camera’s autofocus system might kick in, and the focus point and exposure level might automatically re-adjust.
To ensure this doesn’t happen, you can use the AE/AF Lock feature to lock the focus and exposure values. This effectively disables the autofocus system, allowing you ultimate control over focus and exposure.
How To Use AE/AF Lock To Lock Focus & Exposure
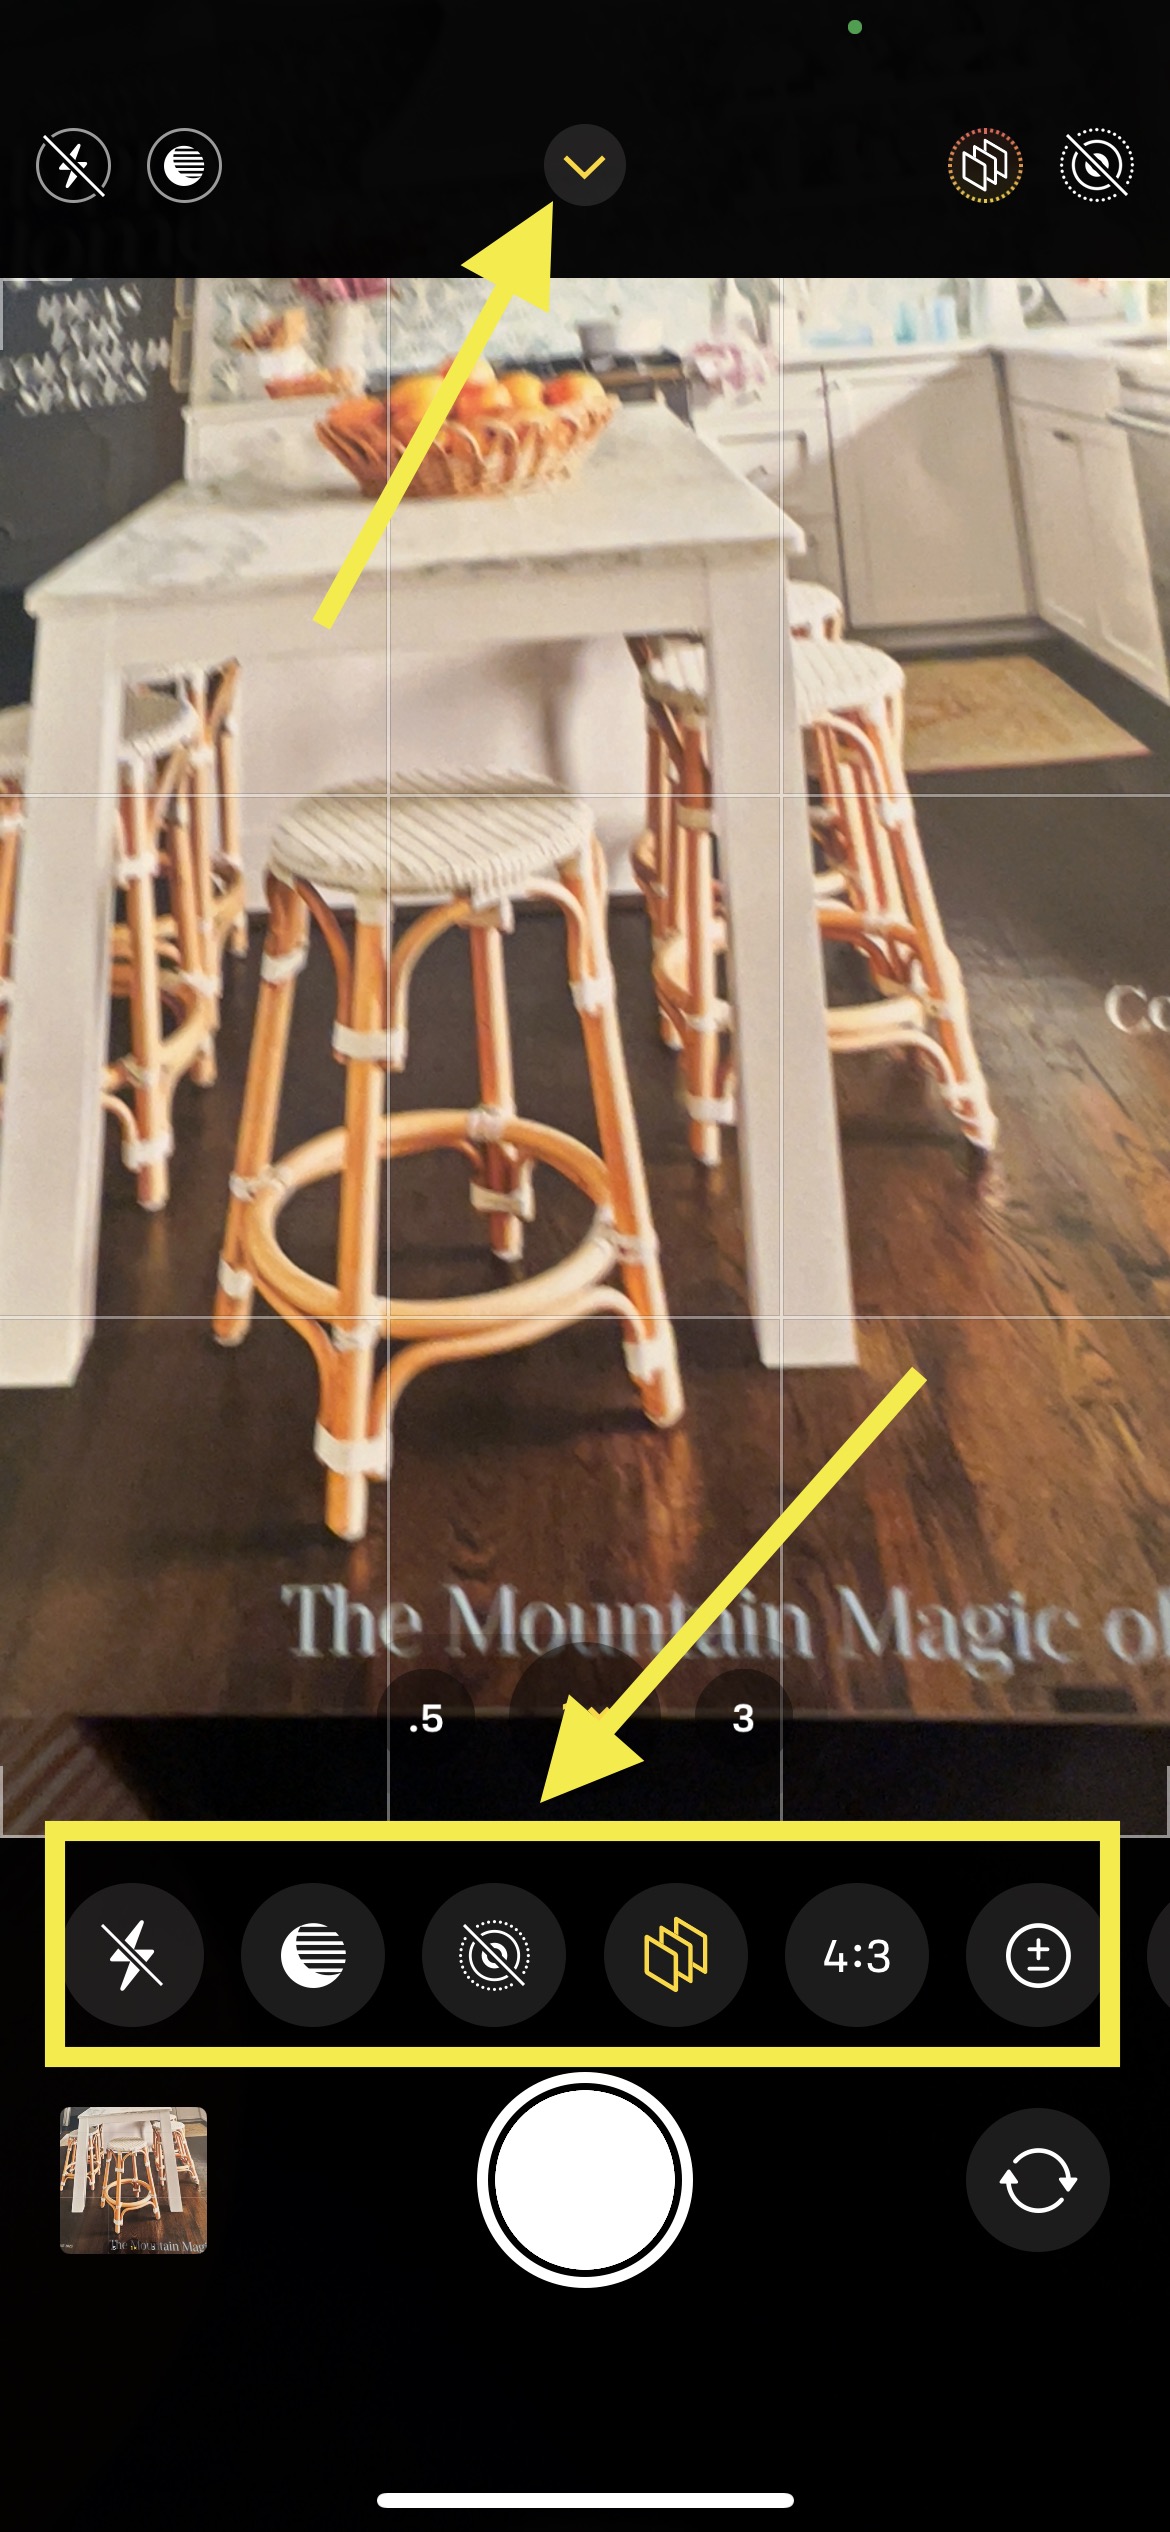
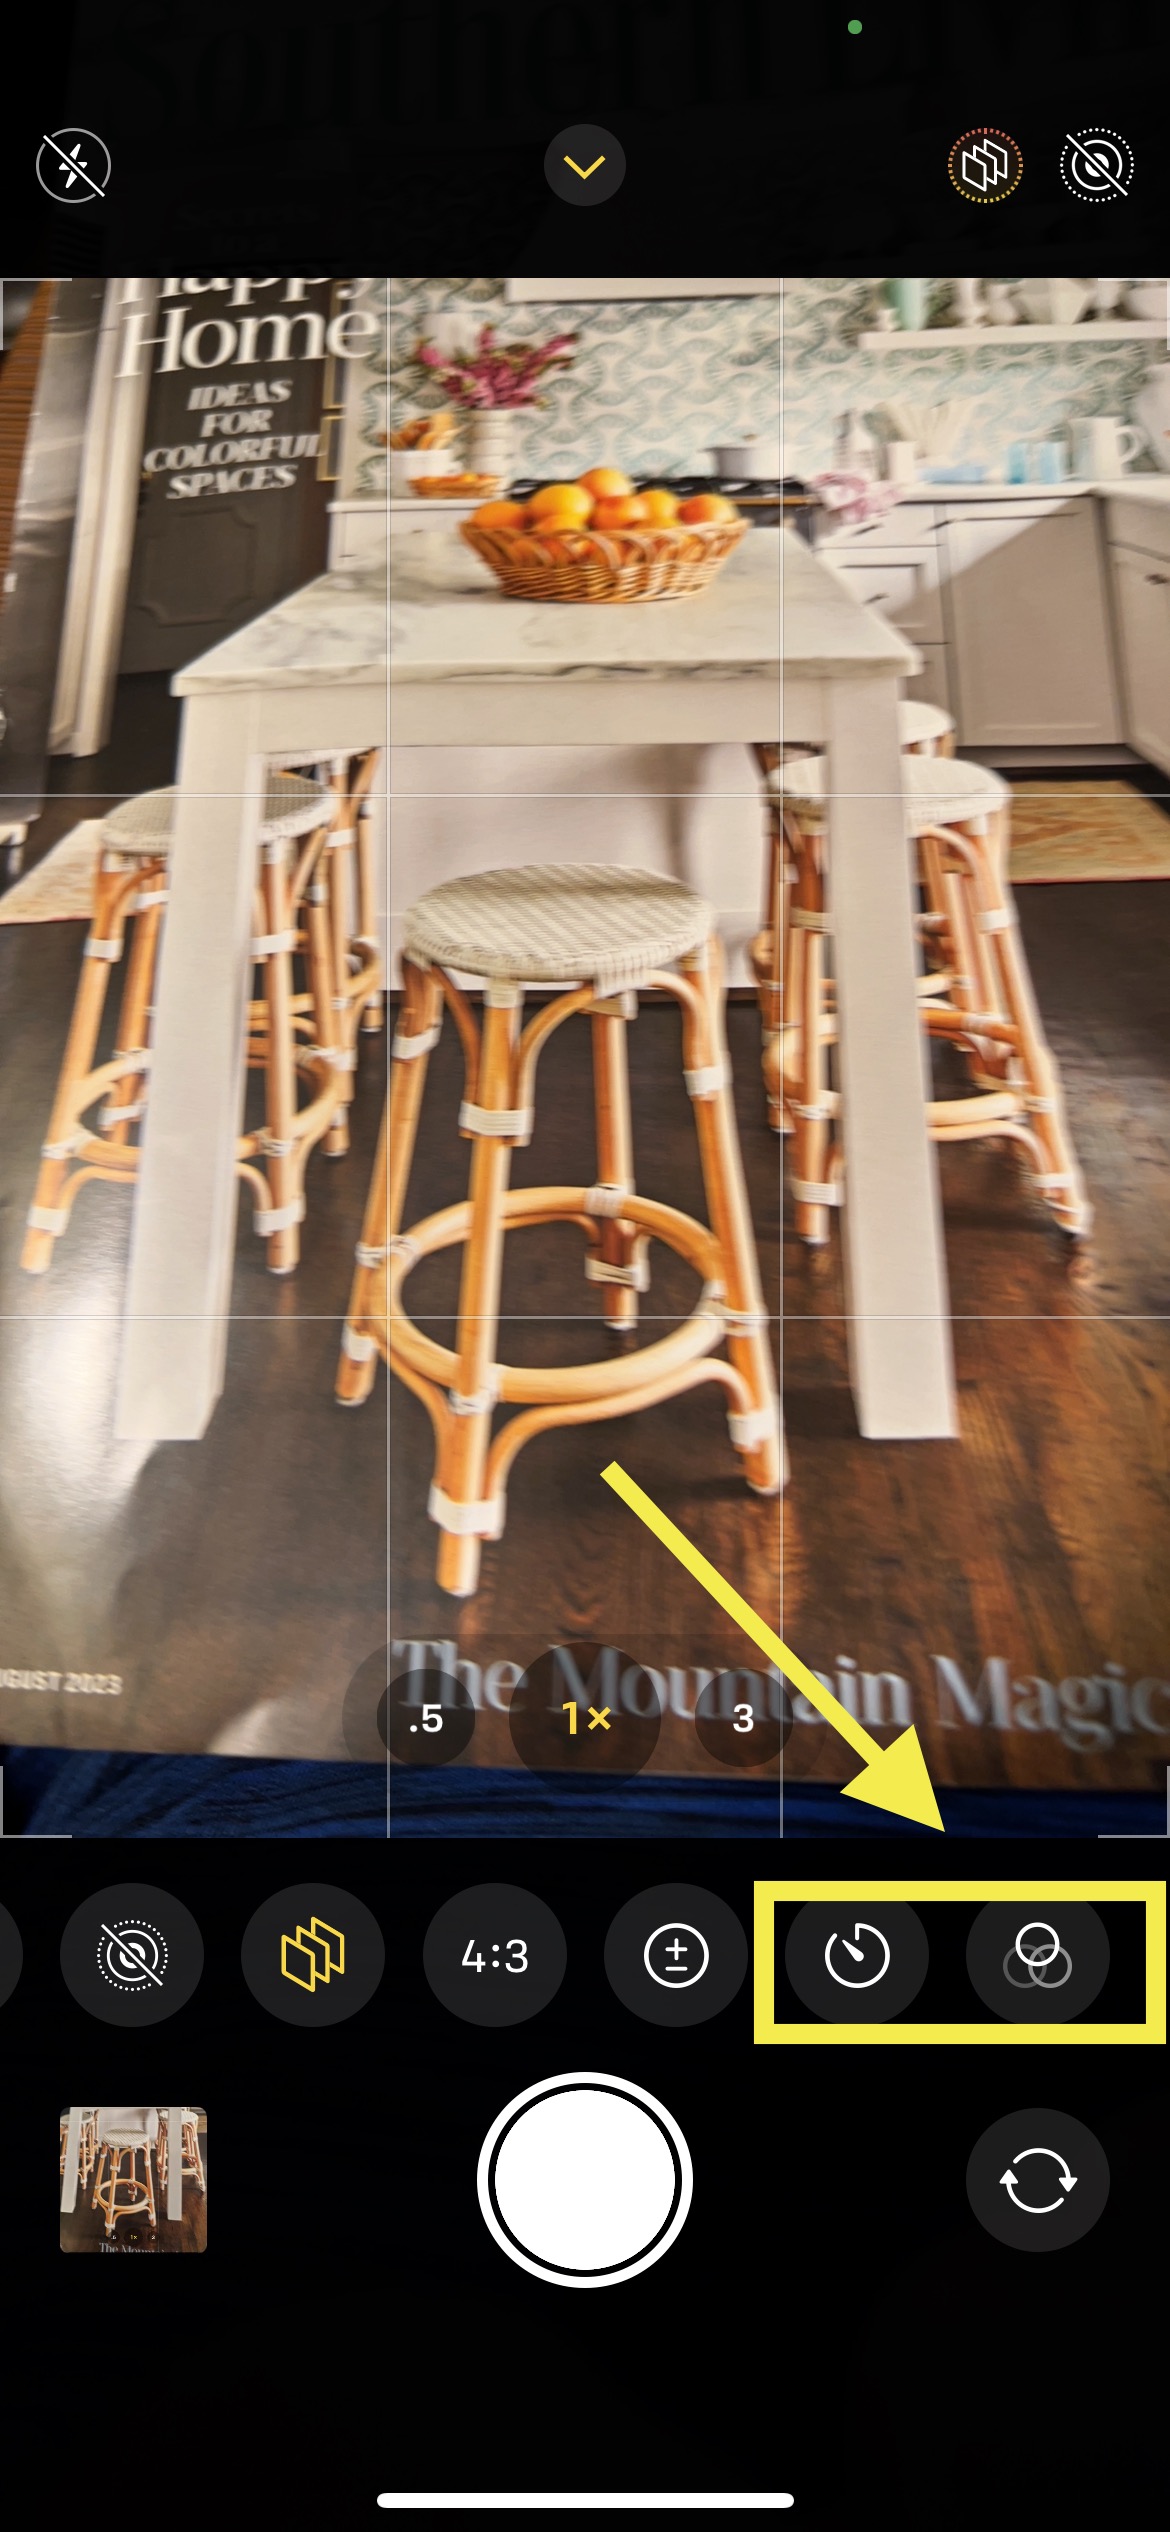
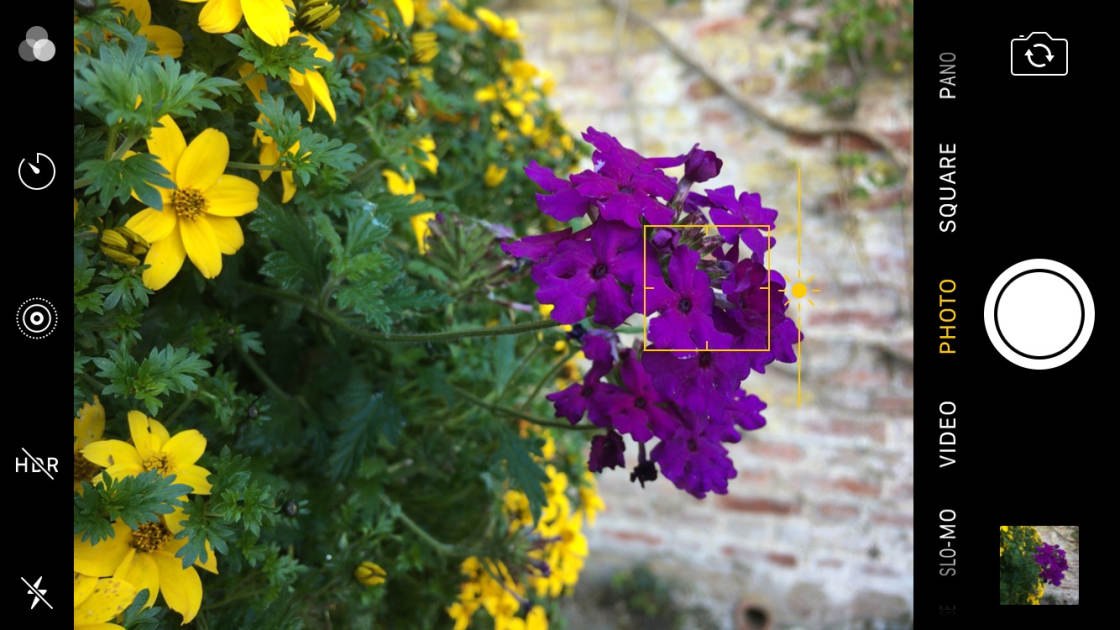
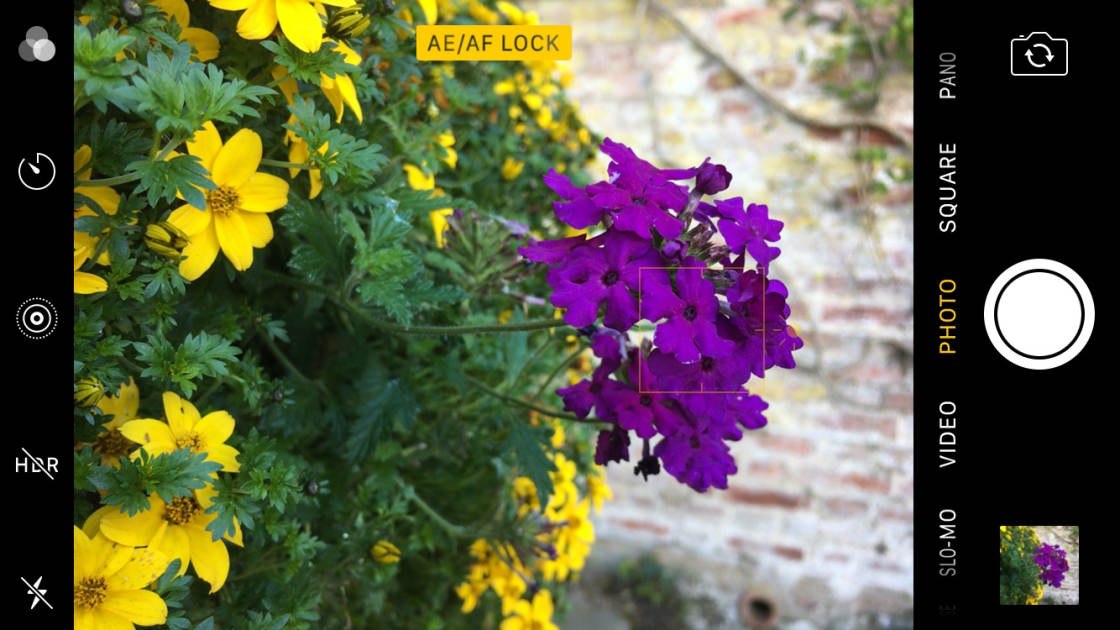
To lock the focus and exposure point, simply tap and hold on that part of the screen for a few seconds. When you see AE/AF Lock in a yellow box at the top of the screen, release your finger.
When AE/AF Lock is activated, the focus is locked on that part of the scene. It will remain locked until you tap on another part of the screen.
It even remains locked after you’ve pressed the shutter button. This is great because it allows you to take multiple photos of the scene without having to set the focus and exposure for each shot.
Just like when you set the focus by tapping once, the exposure level is automatically set to expose properly for the area that you’ve focused on. However, you can still tweak the exposure by swiping up or down on the screen.
To unlock focus and exposure, just tap anywhere on the screen. The AE/AF Lock in the yellow box will disappear to indicate that you no longer have focus and exposure locked.
It’s important to note that once you’ve locked focus, you shouldn’t change the distance between your camera and the subject. In other words, don’t walk towards or away from your subject.
If you do move forwards or back, the camera will end up focusing on the wrong part of the scene, e.g. in front of or behind the subject.
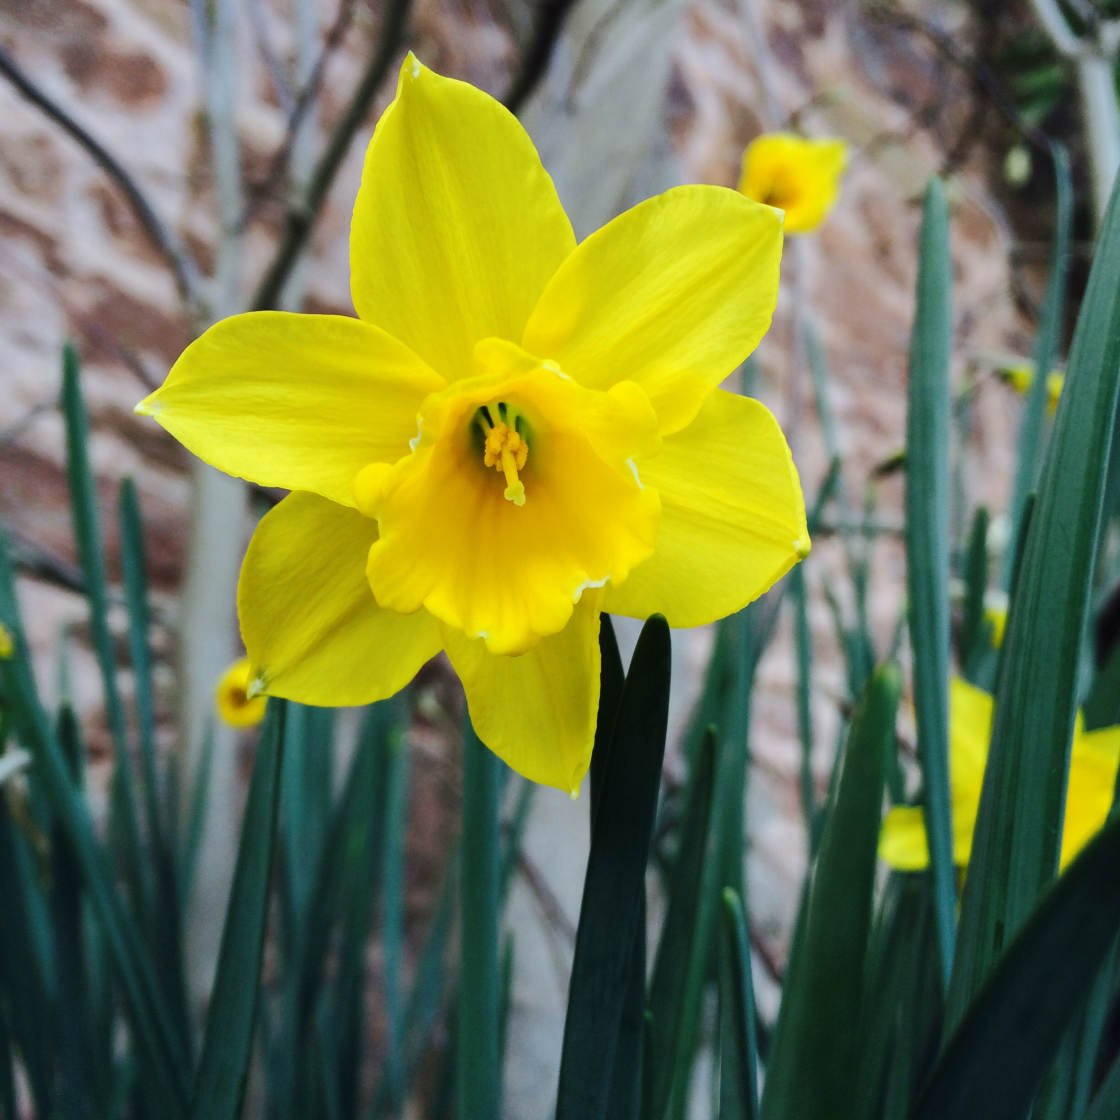
Below is a photo where the flower in the foreground is in focus, while the background appears blurred.
Now look what happens when the camera is moved closer to the flower. Because AE/AF Lock was activated, the camera didn’t refocus onto the flower in the foreground. Instead, it ended up focusing on the leaves behind the flower.
So once you’ve activated AE/AF Lock, don’t move the camera closer or farther away from the subject. If you need to move forwards or backwards to recompose the shot, tap once on the screen to deactivate AE/AF Lock, then reset the focus and exposure from your new shooting position.
When To Use AE/AF Lock
The AE/AF Lock feature is useful in many shooting situations. You may even get into the habit of using it every time you take a photo.
Let’s take a look at some common scenarios where using AE/AF lock with help you achieve better focus and exposure in your image.
1. Any Scene With Movement In The Background
If your scene includes moving elements in the background, your iPhone may be tricked into switching focus from the main subject to these less important elements.
For example, if a person or vehicle was to pass behind your subject, the camera may refocus onto that moving subject.
Using AE/AF Lock prevents this from happening as it allows you to keep the focus locked on your main subject. Once focus is locked, the camera will remain focused on this subject no matter what happens elsewhere in the scene.
In the example below, the stone arch was the main subject of the photo. To prevent the iPhone from refocusing onto the people moving around in the background, AE/AF Lock was used to lock focus and exposure on the stones.
Remember, to lock focus and exposure you simply tap and hold on the main subject until you see AE/AF Lock on the screen. If the exposure doesn’t look quite right, you can always brighten or darken the image by swiping up or down on the screen.
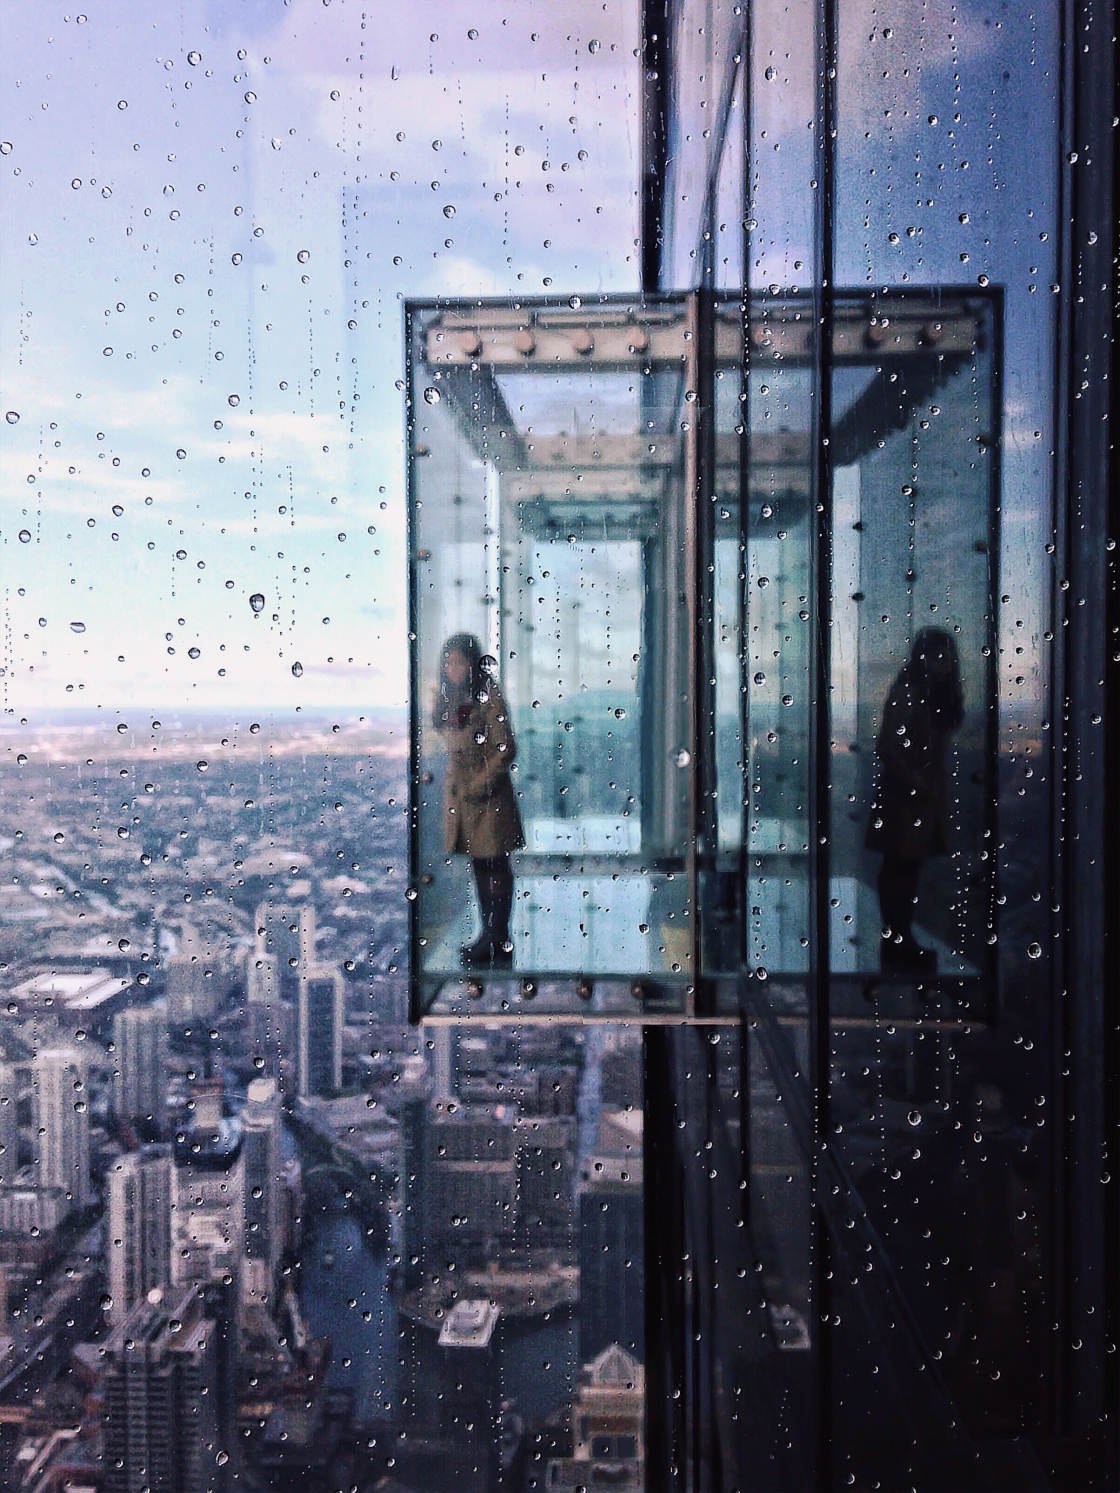
Another example where AE/AF Lock should be used is when you want to photograph something transparent or semi-transparent, such as raindrops on a window-pane.
If there’s movement in the background that you can’t control, locking focus on the raindrops will ensure the iPhone doesn’t refocus on the background.
2. When Taking Multiple Shots Of The Same Scene
If you think you’re going to want to take more than one picture of the same scene, use AE/AF Lock to save you from having to set focus and exposure for each separate shot.
Remember that when you activate AE/AF lock, the camera keeps focus and exposure locked even after you press the shutter button. This allows you to take multiple photos of the same scene – with the same focus point and exposure value – without having to set the focus and exposure for every shot.
This is perfect for those times when you want to try out several slightly different compositions of the scene. In the example below, AE/AF Lock was used to set focus on the two people fishing.
After taking the first shot, I recomposed slightly to include more foreground within the frame and to bring the horizon higher up.
Because focus and exposure was locked, it meant that both images had the same focus and exposure settings, and I didn’t have to set them again for the second shot.
AE/AF Lock is also useful for situations where there’s some unpredictably in the scene and it might be difficult to get the perfect shot first time.
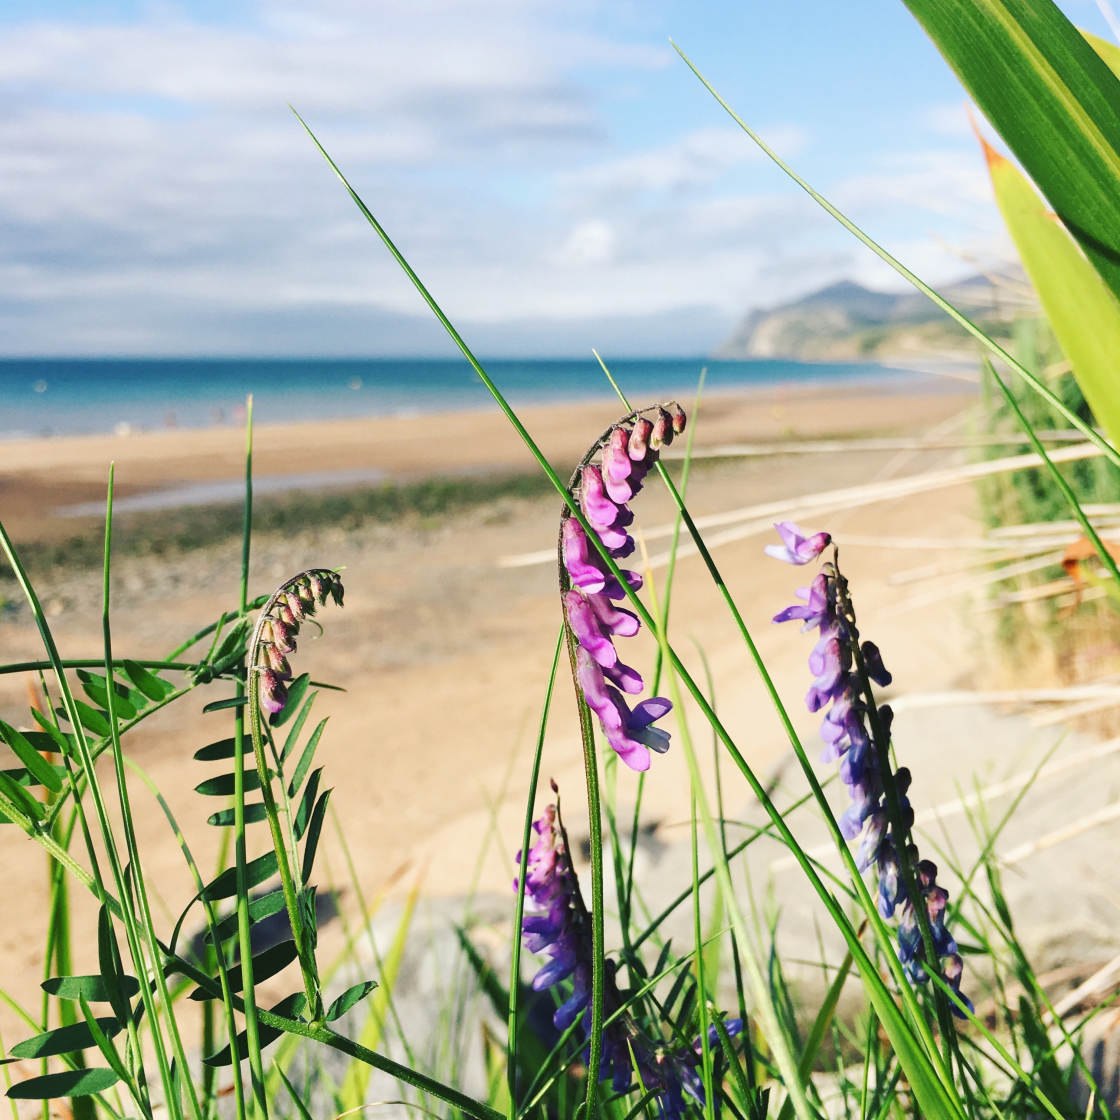
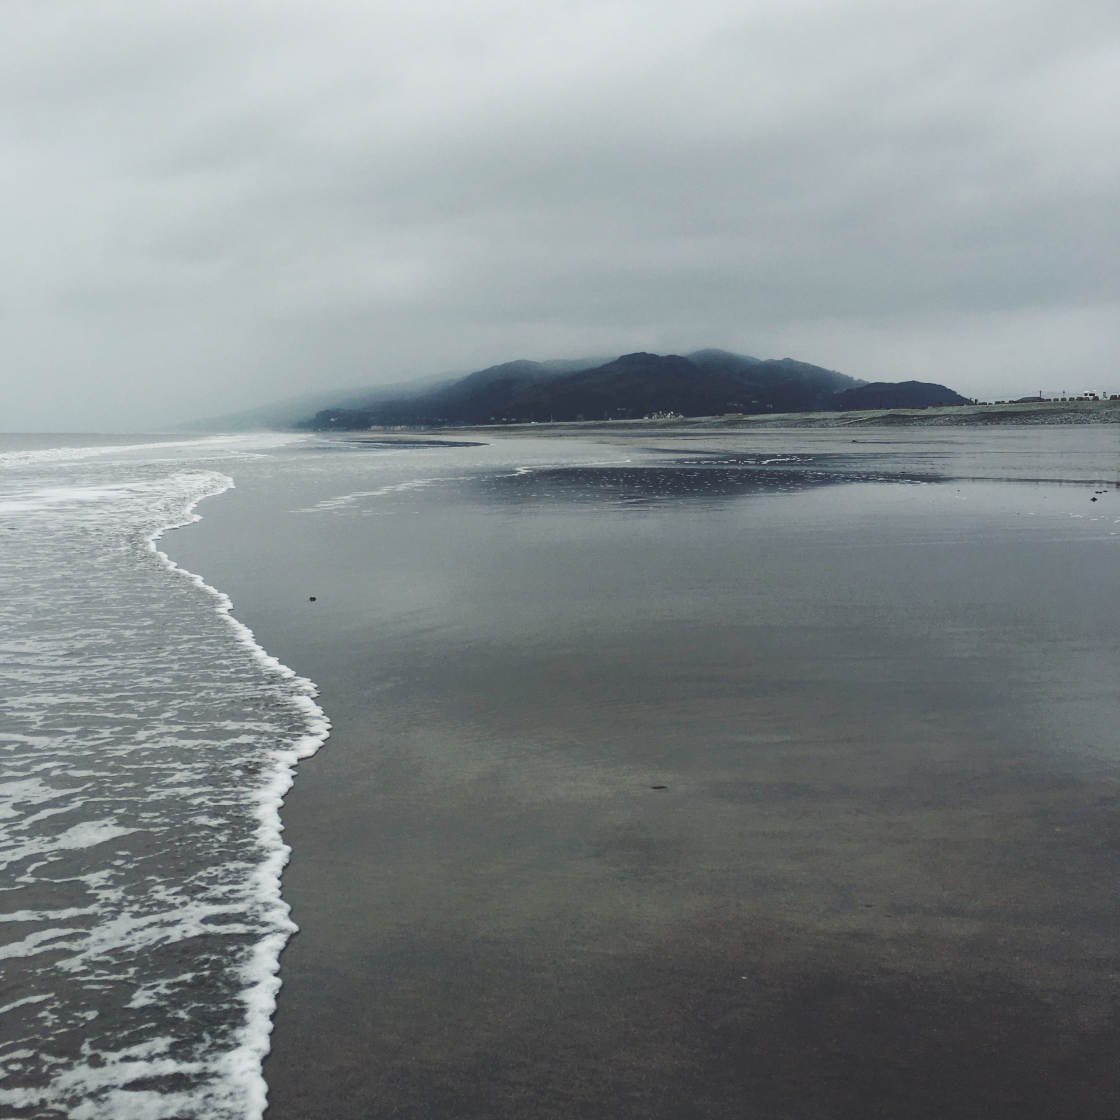
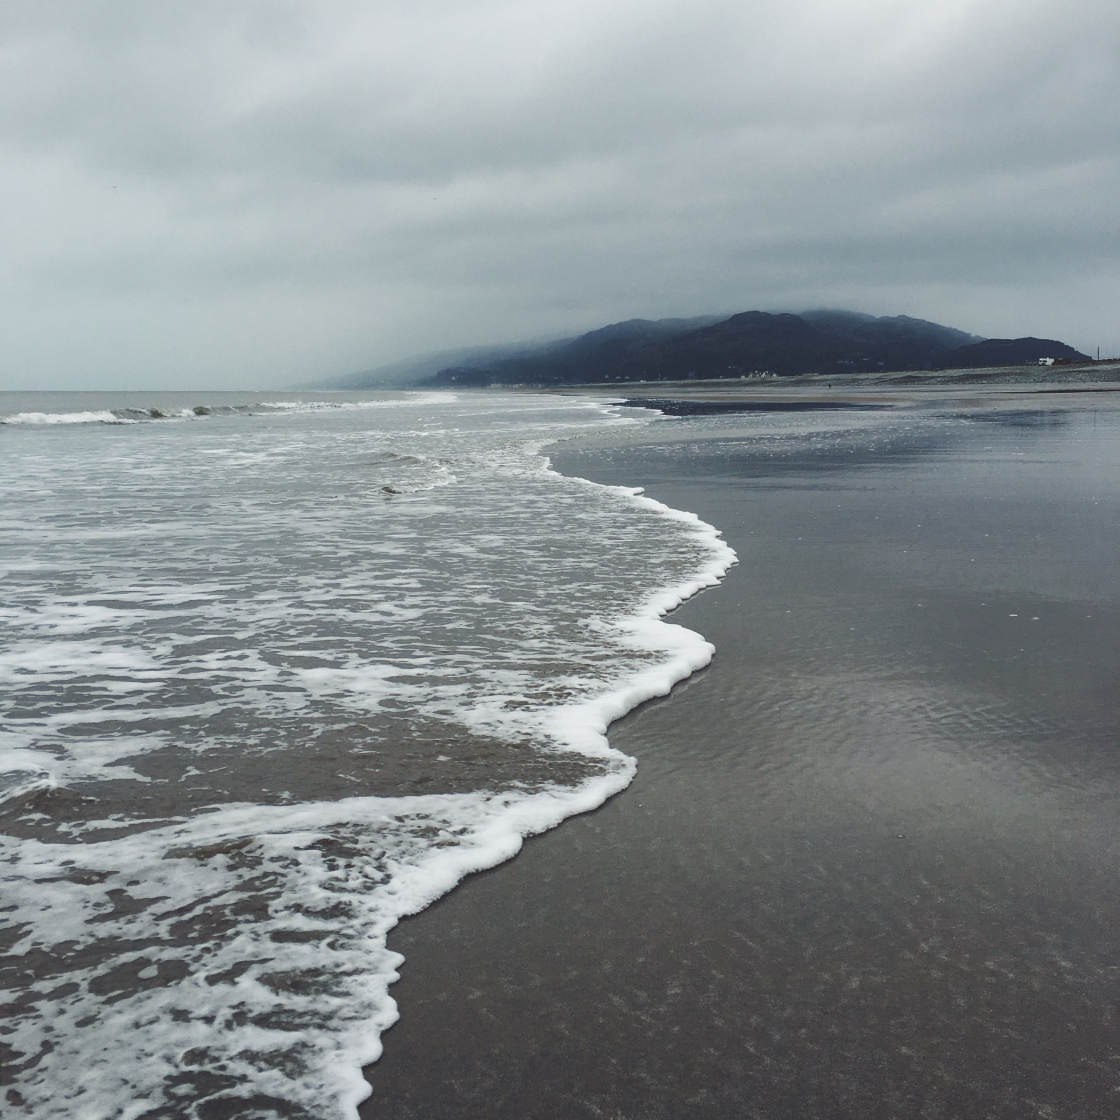
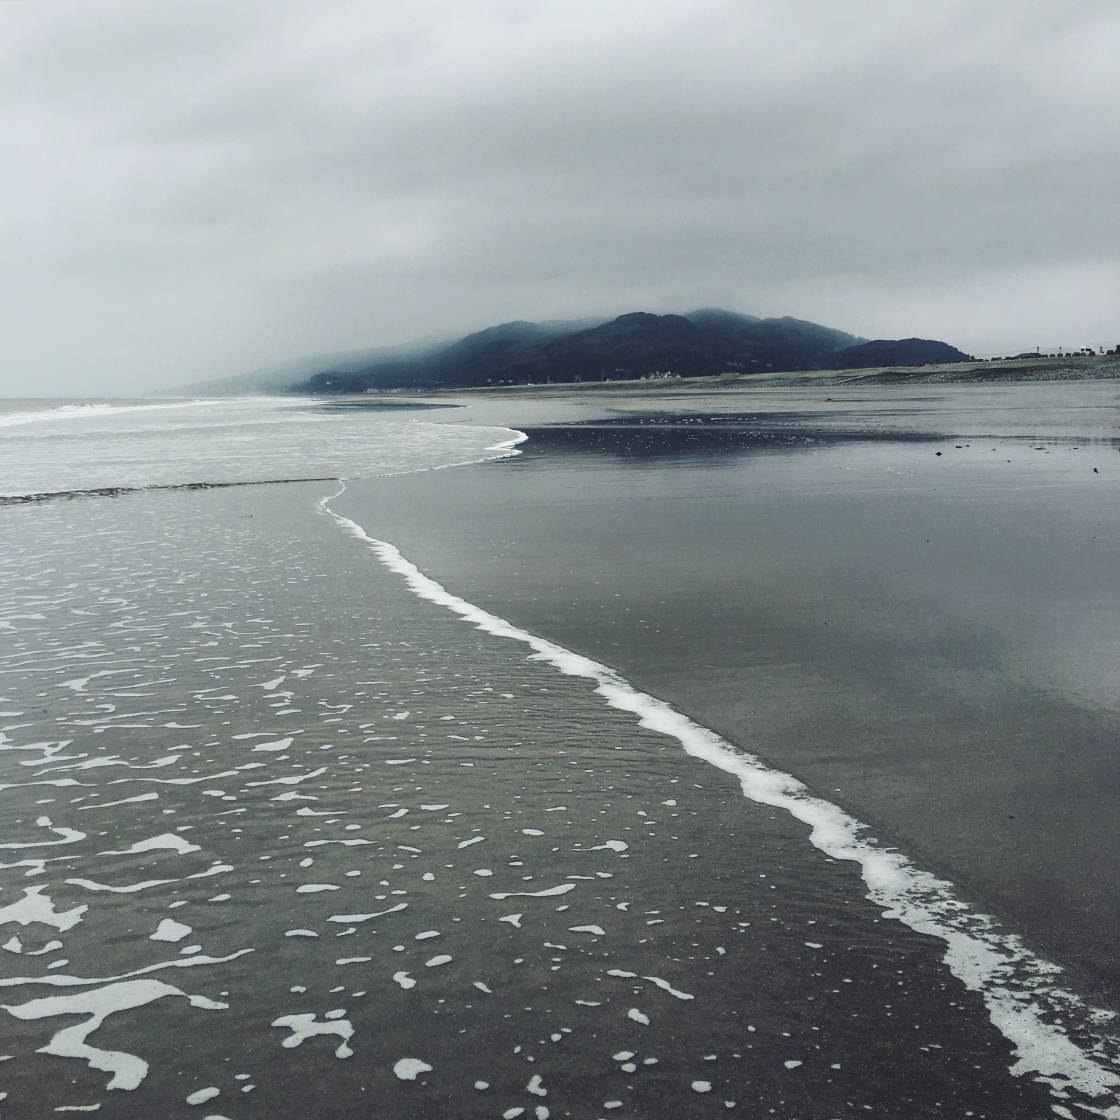
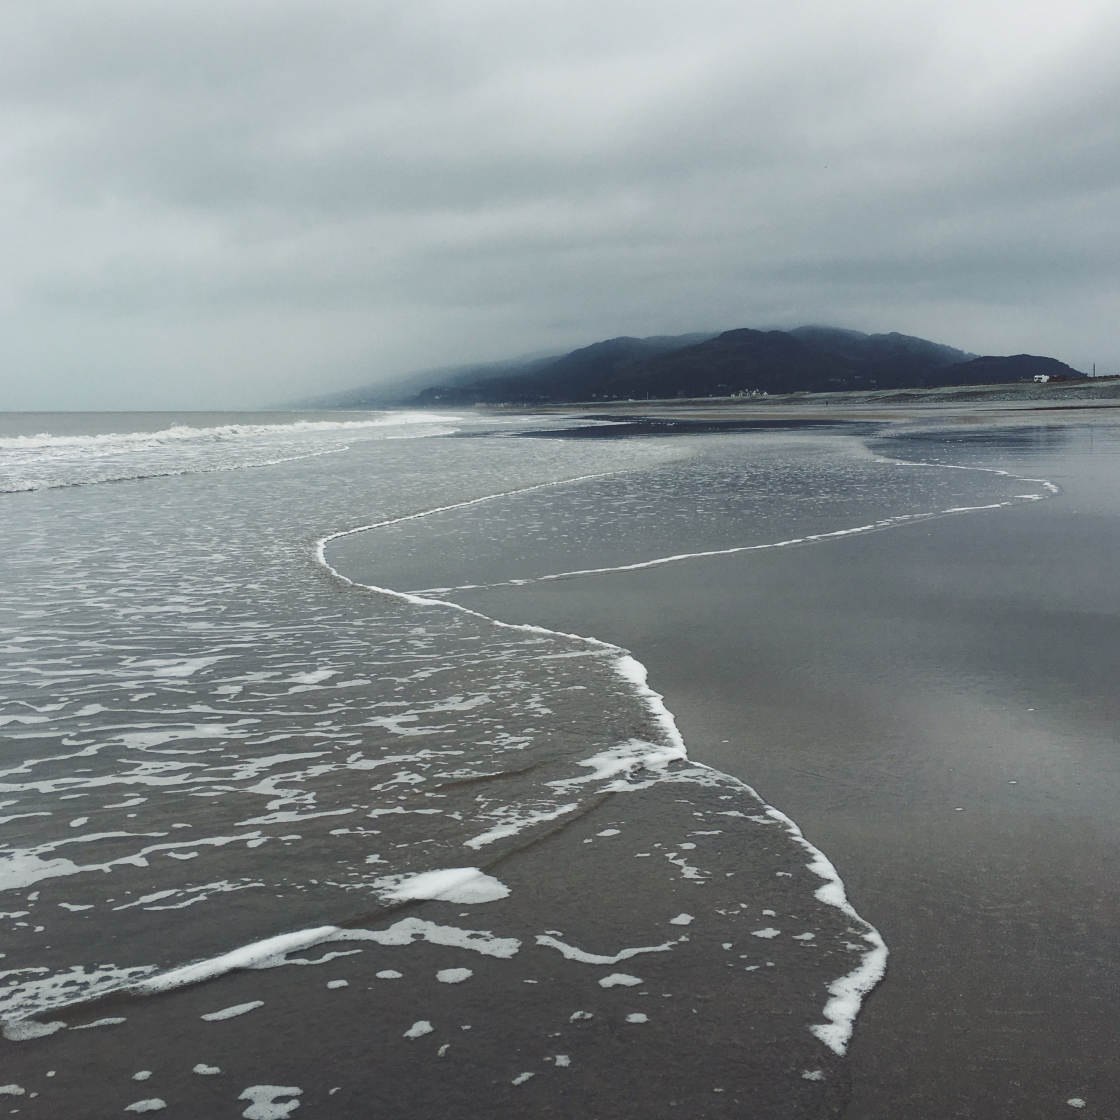
For example, in the beach photos below, I wanted to take several photos as the waves were moving up the beach.
By activating AE/AF Lock, I was able to take as many shots as I wanted, safe in the knowledge that the focus point and exposure level would be exactly the same for each image.
Another situation where you might want to take several photos of the same scene is when you want to try shooting at several different exposure/brightness levels.
Remember that even when AE/AF Lock is activated, you can still manually adjust the exposure by swiping up or down on the screen. When you adjust exposure, the focus point isn’t altered.
So you can lock focus by tapping and holding to activate AE/AF Lock, take a shot, and then adjust the exposure slightly and take another shot.
Below are two examples of the same scene shot at slightly different exposures. Notice the difference in brightness between the two images.
Taking several different exposures of the same scene ensures that have the best chance of getting at least one perfect shot that isn’t over or under-exposed.
3. Macro Photography
If you’ve ever tried close-up macro photography using an add-on macro lens for iPhone, you’ll know how difficult it is to get your subject in sharp focus.
This is because you typically get a very shallow depth of field with macro lenses. This means only a very small portion of the image will be in focus while the rest will appear blurred.
Even the smallest change in distance between the iPhone and the subject can render the subject out of focus. This is especially apparent when you’re hand-holding the iPhone as it’s difficult to keep the phone perfectly still.
A good solution is to compose the shot, then tap and hold to lock focus on the part of the scene you want in focus, e.g. a single petal of a flower, or the head of an insect. Don’t worry if it’s not quite in focus yet.
Adjust the exposure if necessary, then with very small hand movements, make adjustments to the distance between your iPhone and subject.
As you move the phone slowly forwards or backwards, you’ll notice that different parts of the subject come into focus. When you’re sure that you’ve got the focus perfect, press the shutter button to take the shot.
It’s worth noting that burst mode (where you hold the shutter button down) is also useful here. This is because you’ll get several shots per second as you make these tiny adjustments, and your chances of getting the perfect shot increase dramatically.
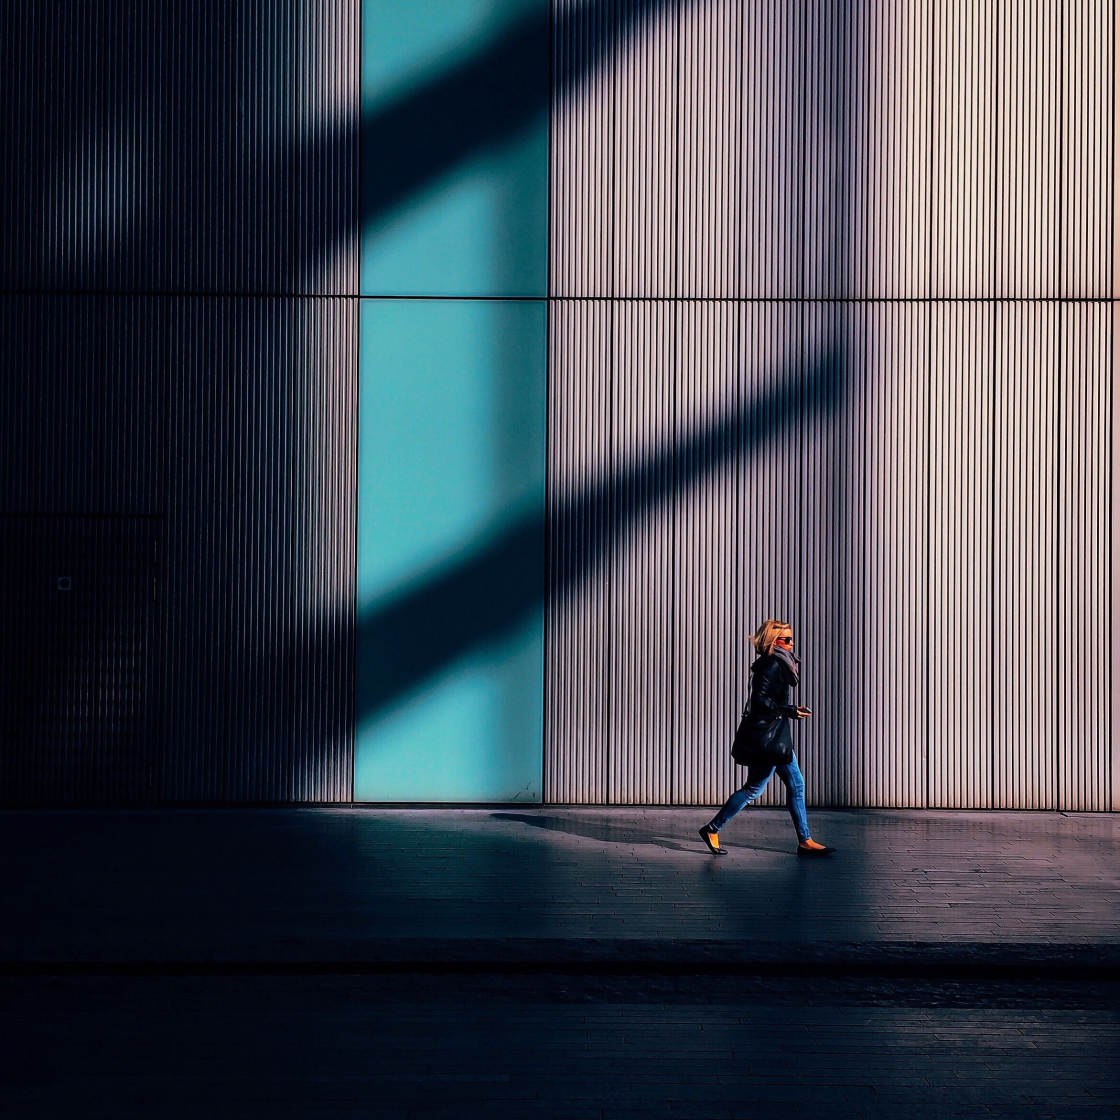
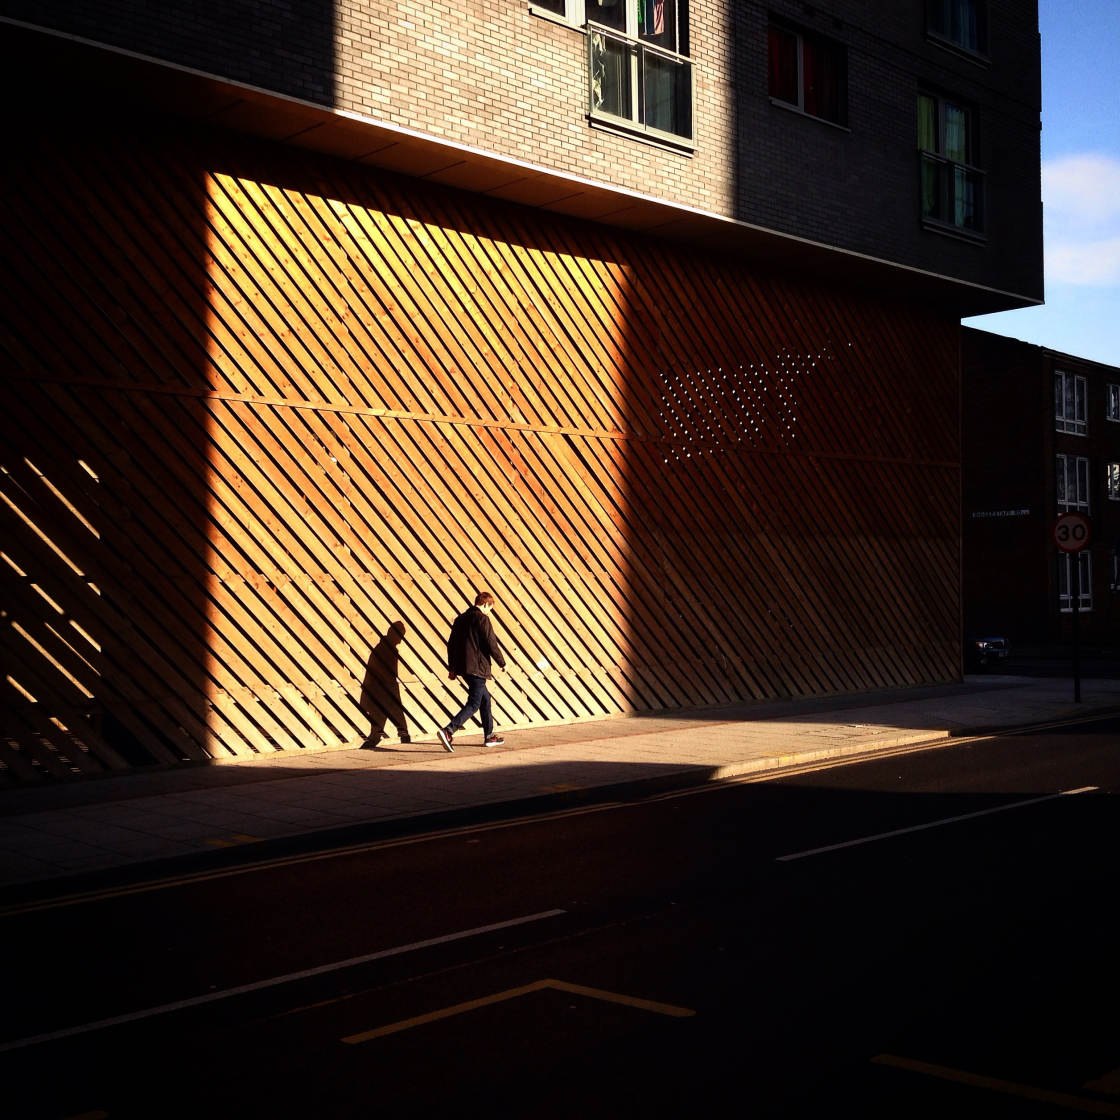
4. Street Photography
With street photography it’s often important to be discreet, so that your presence as a photographer doesn’t distract the subject.
A cool trick is to aim your iPhone towards where your subject will shortly arrive, and then shoot the photo as they pass. By doing this the subject assumes you’re not interested in them as you’re not pointing the camera directly at them until they walk into your shot.
The only problem with this technique is that the iPhone will focus on whatever is in the background – because it doesn’t understand your intention.
This is where AE/AF Lock comes in handy. It allows you to pre-focus on the spot where your intended subject is likely to be when they reach the location you want to shoot.
To set your focus point you could use markings on the pavement or road, a sign-post, a trash can, or another person who has passed by before them.
Aim your iPhone at this marker, then tap and hold the screen to select the marker as your focal point. The focal point is now locked, ready for you to capture your subject as they walk past. You can adjust the exposure manually if necessary.
Note that once you’ve activated AE/AF Lock, you can reframe the composition if you wish – as long as you don’t move forwards or backwards from your original spot.
An added bonus of this technique is that once focus is locked, you can take as many photos as you want – either of the same subject as they walk by or of different subjects entirely – without having to set focus and exposure for each shot.
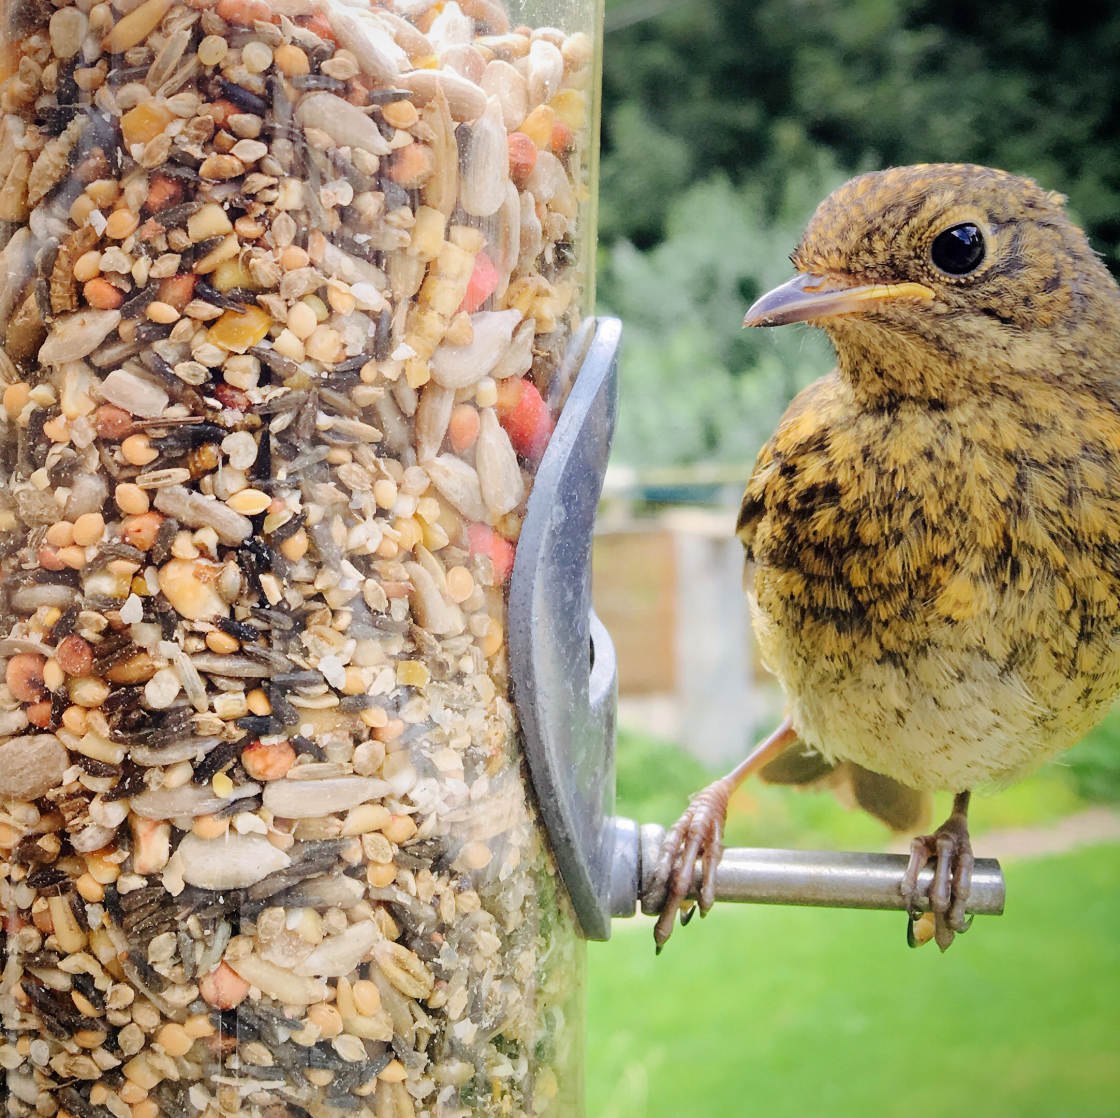
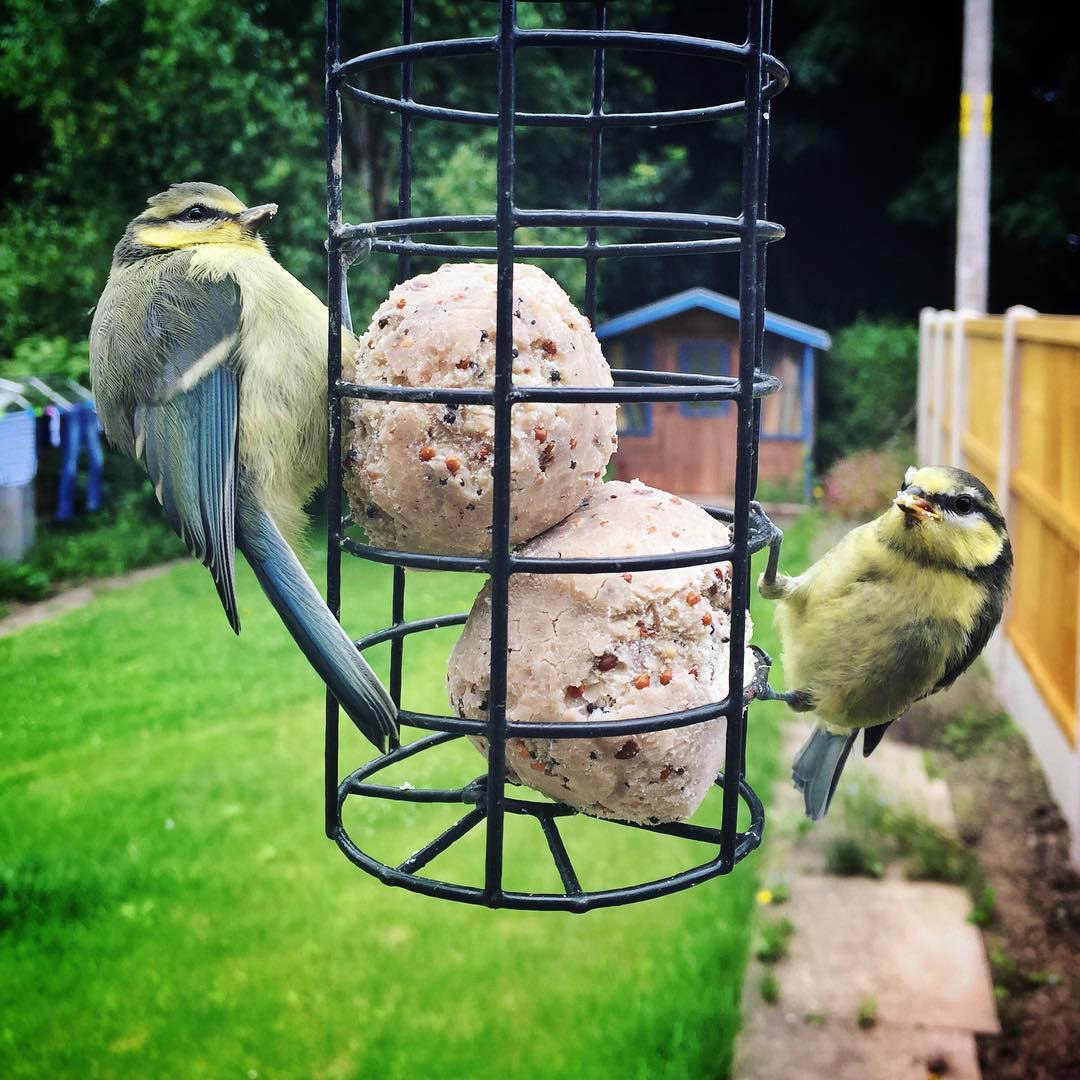
5. Wildlife Photography
Capturing wildlife on your iPhone is quite tricky, mainly because wild birds and animals are typically cautious and won’t come close enough to be photographed.
Because the iPhone’s lens is fairly wide-angle, filling the frame with your subject requires you to shoot from a close distance.
If you, the photographer, are present too, then it’s unlikely you’re going to be able to lure your subject close enough to shoot successfully.
A great trick is to set up your phone on an iPhone tripod or other solid surface very close to where your subject will go. Then lay down some food that will entice your subject. Now use the AE/AF Lock feature to pre-focus on the food, then retreat to a safe distance.
You could use the 10 second timer in the camera app, but this will only give you one chance to get the shot before you have to go back to the iPhone to press the shutter button again – scaring the wildlife away in the process.
The best solution is to use a remote shutter release. I prefer a Bluetooth one that works from several meters away, but you could also attach your iPhone earbuds and use the volume control to trigger the shutter – although you’d probably still be too close not to scare the subject away.


-")


